Showing posts with label Meat-free meals. Show all posts

Wednesday, 4 November 2015

Tofu, Butternut and Mango Curry from BBCGoodFood


Good evening my ravenous readers! As the evenings draw in, I am forced to come to terms with the necessity of natural daylight in which to take photographs, specifically of food. I am snapping shots of finished dishes on my phone to post on Instagram, and even thought they can be tweaked, brightened up and contrasted, they will never look as good as a photo which has been taken in daylight in the spring or summer. We have also this week removed everything from our kitchen worktops on order to sand and re-oil our oak worktops, which haven't been tended to since we installed the kitchen four and a half years ago. I love my oak worktops, but it is hard to keep them looking nice around the sink, and places where one is constantly pulling things back and forth across the surface, such as food waste bins, scales, a utensil pot. You get the idea. So I've been doing everything at the kitchen table for the last couple of days. Making school sandwiches, chopping up ingredients then travelling with them to the oven, serving dinner directly onto plates. I'm very much a serve-everyone-myself kind of person, rather than letting people serve themselves. It makes life so much easier and there is far less washing up, as if there isn't enough already!

The recipe I'm going to share this evening is from BBCGoodFood and was inspired by an item I picked up at playgroup from the FareShare food; tofu. I'd always been intrigued by tofu, although never enough to actively seek it out in the supermarket, or deliberately search for a recipe online in which it could be used. However, on this occasion, it leapt from the table into my hand, and I thought it was an ideal opportunity to do some experimentation and then tell you all about it. Having acquired my tofu, I did a quick search on BBCGoodFood and immediately this recipe came up, containing two of my all time favourite ingredients; butternut squash and mango, so it was the obvious choice. In my humble opinion, the way the original recipe is worded is a little confusing, so I've decided to re-word it here for your benefit. You can view the original recipe here and maybe see what I mean. If you have a look through it, you will see that one of the ingredients is tamari. Tamari is basically a gluten and wheat free soy sauce, mainly obtainable from health food shops. To be honest, soy sauce is much nicer, so if you don't have any tamari but have soy sauce, don't bother making a special trip to find some, unless, of course, you are gluten intolerant or following a gluten-free diet, in which case it's the ideal substitute.

Ingredients (for two adults and two small children)

One butternut squash, peeled, deseeded and cut into 1" chunks
Half a 397g pack of firm tofu (I used Cauldron, as does the original recipe)
One onion, finely chopped
Small piece of ginger, peeled and finely chopped
One garlic clove, finely sliced
One lemongrass stalk, woody tip and outer leaves removed (bash the end to release the oils)
1/2 a red chilli (or use cheats squeezy chilli, about 1 tsp)
1/2 tsp turmeric
1/2 tsp cumin
1/2 tsp ground coriander
One ripe mango
Couple of handfuls of baby spinach
200ml veg stock (from a cube)
Half a can coconut milk (I use Pride - it's amazing!)
A shake of soy sauce or tamari
Juice of one lime
Small bunch of coriander
150g brown rice
Olive oil


Method

Pre-heat the oven to fan 180C.
Peel and deseed the squash then chop into 1" chunks and arrange on a baking tray. Give it a good lug of oil and twist of seasoning, then place in the oven for 40-45 minutes.


Prepare the onion, garlic and ginger by chopping as shown.


Prepare the lemongrass by chopping off the end and outer stalks, then squashing it with the flat end of a chef's knife.


Put the rice into a saucepan with approximately one and a half to two times its depth in water, and bring to the boil. Once boiling, turn down to a medium simmer for about 25 minutes. Keep an eye on the water because brown rice takes significantly longer to cook than white long-grain or basmati. Once cooked, set aside.

Meanwhile, put a frying pan on the hob, add a generous lug of olive oil and heat to medium-high. Prepare the tofu: open the packaging, drain, then remove the tofu and pat dry with kitchen towel. Cut the whole block in half.


Cut into cubes...


 ...then add to the pre-heated saucepan.


Fry, turning occasionally, until the tofu is beautifully golden all over, then remove from the heat.


When the butternut squash has about 10 minutes left, heat a lug of oil in a wok then add the onion and cook for a couple of minutes until soft but not coloured.


Add the ginger, garlic, chilli, lemongrass and spices and fry for a few more minutes until nice and fragrant. Whilst this mixture is cooking, peel the mango with a swivel peeler, then slice into approximately 1" pieces.


By this time, the squash should be ready, so add it to the wok, along with the chopped mango and stir together.


Add the spinach, followed by the veg stock and coconut milk. Stir well to combine, and increase the heat to bring to a simmer so the spinach can wilt.


Prepare the lime.


Once the spinach has wilted, remove the lemongrass stalk, then add the tofu cubes, soy sauce or tamari, chopped coriander and a splash of lime juice. Stir well to combine and check the seasoning, adding more lime juice, salt and pepper according to taste.


Serve with a helping of brown rice.


There you have it. My mouth is actually watering at the thought of this absolutely yummy meal. All those tastes; the tofu (which I highly recommend, by the way - it's delicious when fried until golden), the roasted squash and the mango, all brought together in my favourite-coconut-milk based sauce. All healthy and really, really enjoyable to eat and fun to prepare.

As you know, I'm not a fan of calling a recipe "vegetarian" just because it happens to be meat-free, but I'm well aware that tofu has connotations of 80's hippies who eat only it and vegetables. I say it's a great ingredient and one to at least try out, if not to use again, as a tasty addition to a meal in its own right, not as some poor excuse for meat. As you can see from the above photograph, this meal translates really well into a family meal to serve to children. The inherent sweetness of many of the ingredients will make everyone unable to say no!

Have you cooked tofu before? What was your experience? I know I'm jumping on the bandwagon pretty late, but better late than never. I hope you've been enjoying some delicious home cooking lately too, and have maybe experimented with a new-to-you ingredient. I'd love to hear about it.

xxx Sam

Tuesday, 20 October 2015

Cajun Bean and Feta Burgers from Tesco Real Food


Hello friends and welcome back! I have such a backlog of recipes to share with you, and when I sat down about 20 minutes ago to go through my recipe albums to decide which one to pick, I was taken aback at how old some of the albums actually are (ie. how long ago I made some of these dishes and just haven't got round to talking about them) and that I am now far too dissatisfied with many of the photos to even want to publish them. I thought I had about 15 or so albums of recipes on my laptop, but of those, the number I am happy to share has diminshed to four! I really can't believe how simply dreadful my photographs were to begin with, and how quickly they've changed, even in the last few months. So I need to get photographing again basically, to restock my recipes to be shared folder and increase what options I have to share with you. Some of the recipes I had on my list are from spring, and are just so unseasonal now. So I've decided for this evening to share a delicious recipe I cooked not too long ago from Tesco Real Food: Cajun Bean and Feta Burgers. I think it's a really good transitional recipe as it's hearty with the beans and spice, yet if you don't serve it with anything on the side, it is sufficiently substantial for a main course yet light enough for one not to be overly full after eating it.

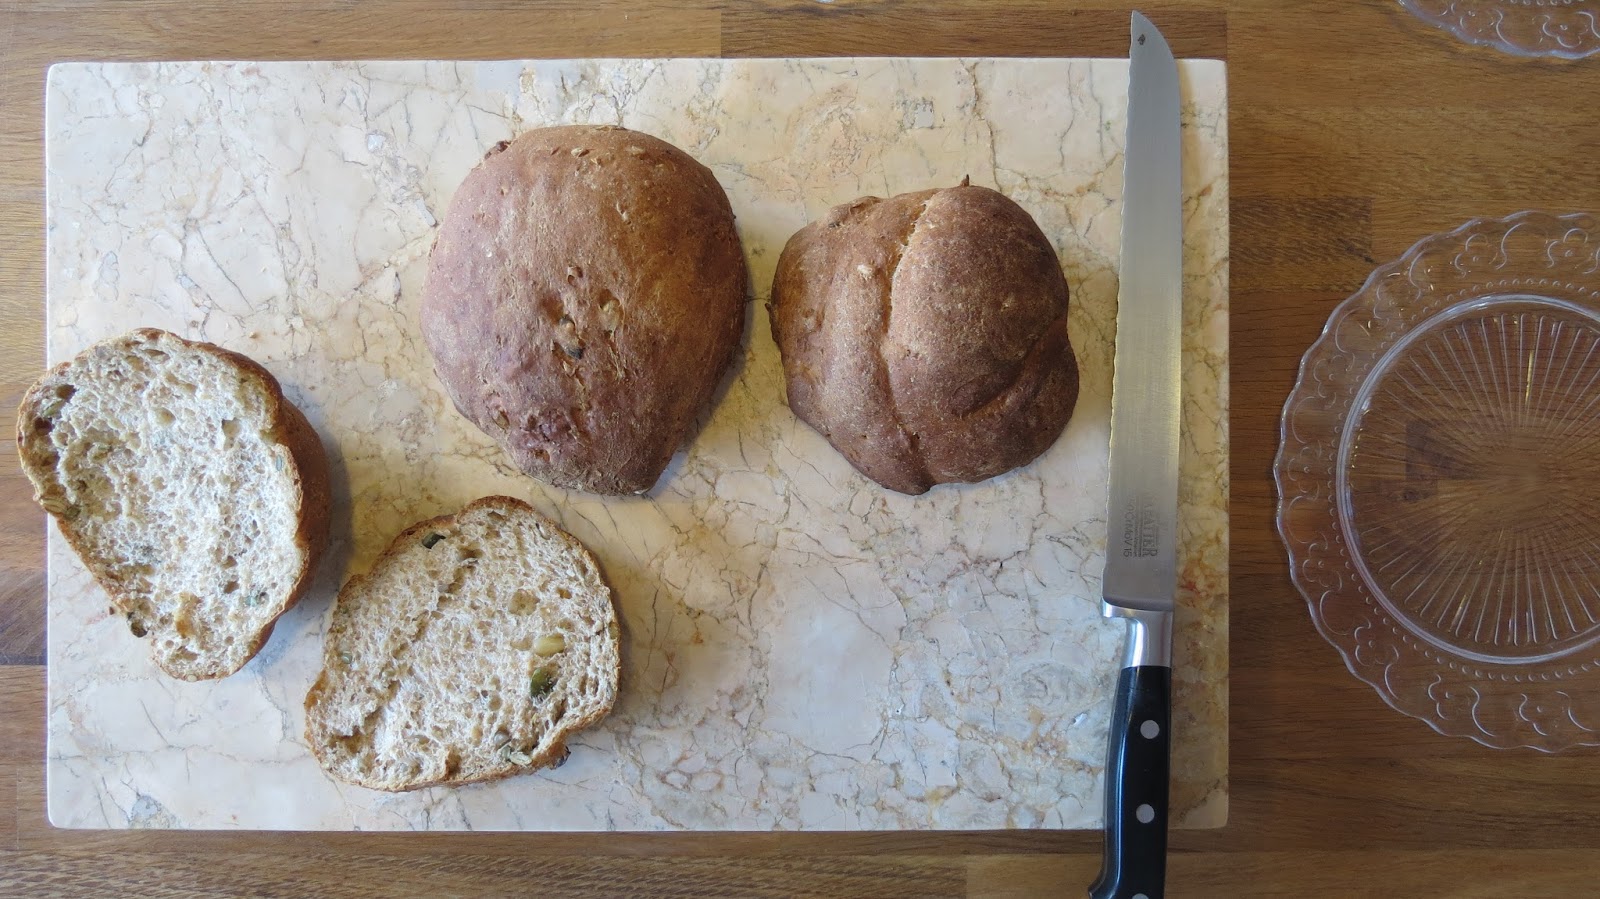
As you'll see, I didn't buy the fluffy, floury, tasteless white bread rolls (I'm not a fan, can you tell?) but made my own rolls in which to serve the buns, the recipe for which I'll provide in a moment. These are much heartier than the generic rolls the recipe specified, and make the overall meal far more interesting and enjoyable. Obviously you will need to prepare the dough in advance, but it takes no time and is worth it in my opinion. My recipe is actually adapted from the recipe on a packet of Tesco Stoneground Wholemeal Flour. The original is pretty delicious, I just made it a bit more adaptable. Here follows the recipe for malted grain, seeded bread rolls. As you can see from the photos, I made rather generously sized rolls, two large and one smaller, for a little one (I can't even remember where the other little one was, it feels like so long ago since I made this meal!)

Ingredients
200g strong wholemeal bread flour
100g strong white bread flour
15g butter
1/4 tsp salt
Scant tbsp dried active yeast
200ml warm water
1 tsp sugar (I use golden granulated)
50g mixed seeds of your choice
1 tbsp honey

Method
Measure out 150ml  warm water, add the tsp sugar and stir in the yeast. Set aside for ten minutes until the yeast has risen to the surface.
Menwhile, put the two types of flour and salt in a large mixing bowl along with the butter, chopped up into small pieces. mix together well and rub in the butter.
Stir in the seeds.
Make a well in the middle and add the yeast mixture, remaining 50ml warm water and honey and bring together with a wooden spoon, changing to using your fingers once it's really coming together.
Transfer to a floured surface and knead by hand for 10 minutes.
Place in a lightly oiled bowl, cover with oiled cling-film and leave to rise until doubled in size (approximately 1 1/2 hours).


Once risen, knock back briefly then shape into one smaller and two larger rolls. Place on an oiled baking sheet and cover with oiled cling-film (just reuse the piece from the first prove) until roughly doubled in size again. Pre-heat the oven to Fan 200C.


Once risen, place in the pre-heated oven for around 20 minutes, until nicely golden and the bottoms sound hollow when tapped.


You can either make these much earlier in the day or to coincide with the burgers being ready. A good time is probably for them to be ready around half an hour before the burgers, as they will still taste fresh from the oven, but will have cooled sufficiently for the salad leaves not to wilt and the avocado to stay fresh.

As usual when I'm going through a recipe from the internet, you'll find the ingredients list and full method on the original site by linking here. Here is my ingredients photo though. It's looking very fresh and healthy, I must say. I always make my own breadcrumbs in my food processor, so make sure you prepare yours before getting the ingredients together.


The onion is the first thing to be added to a pre-heated pan. 


Once it's in, you can get to work preparing the other ingredients. 

 
Adding the garlic, chilli and cajun spice

 The completed onion mixture

The onion mixture is added to a bowl along with the rest of the ingredients. In the recipe it doesn't specify, but I added the dry ingredients first, followed by the lime juice and beated egg. And don't forget the seasoning.


As you can see, I divided my mixture into three rather than four, and, having the healthy appetite that I do, I don't remember reducing the recipe amounts, I probably just made Husb and my burgers larger with the extra mixture!


 The prepared burgers are placed in the fridge to firm up for 15 minutes or so. This is actually quite an important step as it really does help in the handling of the burgers, particularly in terms of transferring them to the pan. It just makes them less likely to fall apart.

Once chilled, the burgers are added to a pan pre-heated with a generous glug (my words, not the recipes, but I can tell you that one tablespoon of oil will absolutely not be enough to sufficiently cook these beasts) of olive oil. You could also use coconut oil if you like.


 Now you can prepare your lovely, fresh bread rolls.


I like things charred, ok?!?

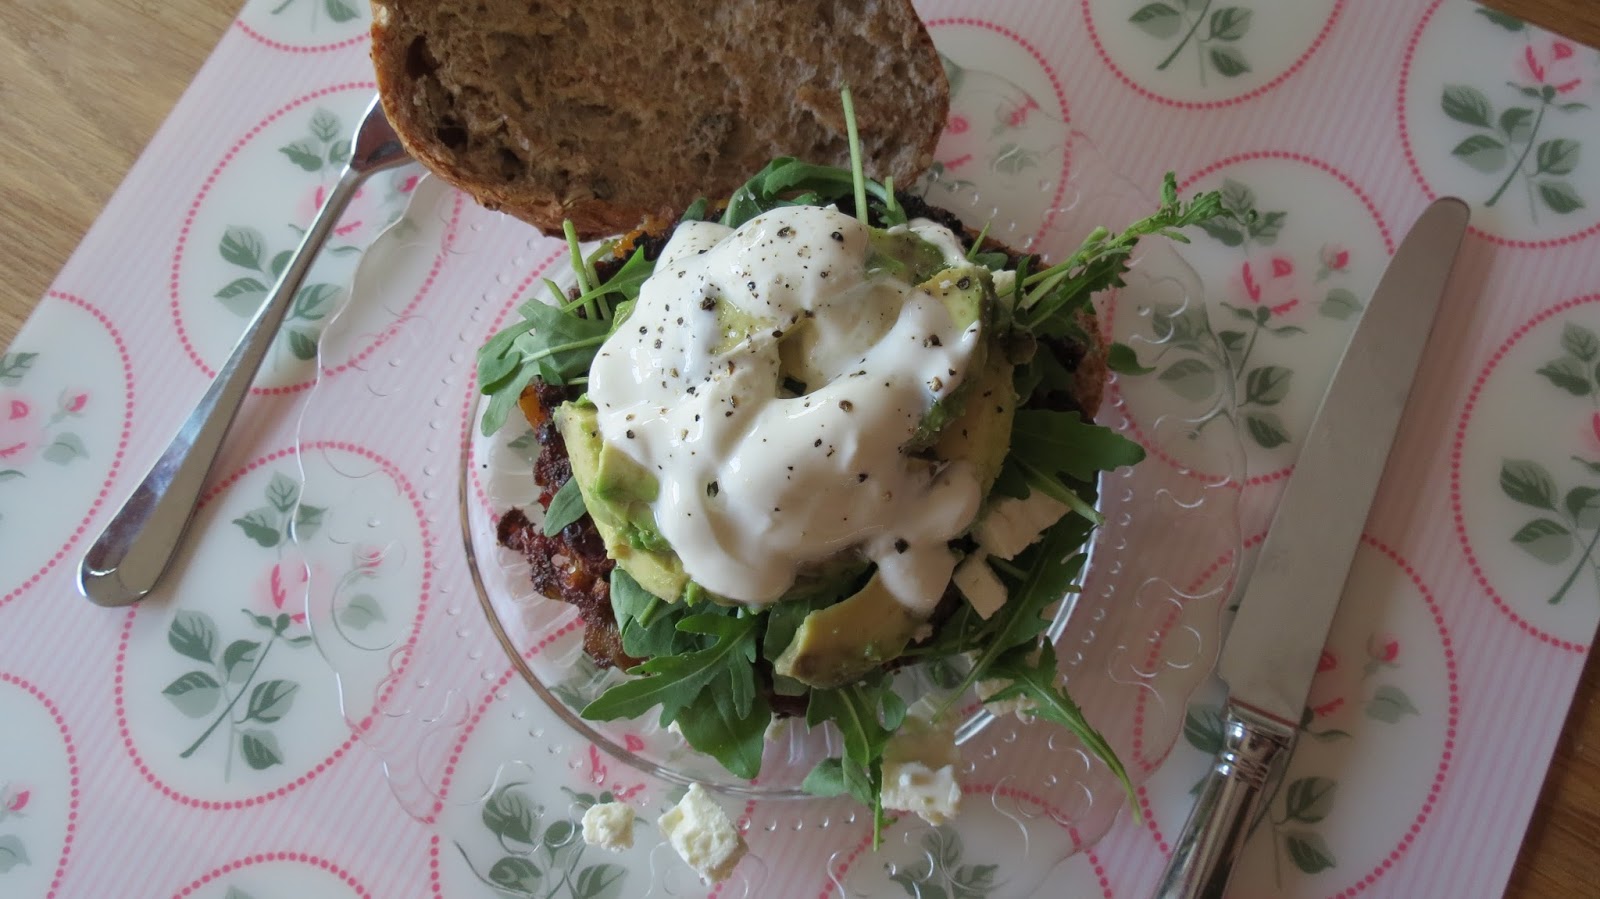
Then you can add the remaining ingredients to finish off the burgers; rocket and avocado topped with a dollop of sour cream.


Now, I wondered if any of you have spotted my error. Can you see those delicious squares of feta, delicately tumbling from the mouth-watering pile of ingredients upon the burger? Well they were supposed to be added to the burger mixture, but because I'd returned the feta to the fridge until it was required in the recipe after I'd taken my ingredients photo, I forgot to get it back out and therefore completely forgot to add it to the burgers. So I added it to the topping instead. I don't think it made a huge amount of difference, except there weren't any pleasantly charred, melting chunks of feta on the outsides of the burgers. To be honest, it would probably be nice with feta both in the burgers and as part of the topping.


I know, how did we even begin to tackle this monster? Cocktail sticks were instrumental in holding it together!

I have to really heartily recommend this recipe. It goes along with my current interest in really thinking about what I'm eating; it is healthy and delicious, and can be made even better by making ones own bread rolls. It's one of those fantastic dishes which goes to show one doesn't need meat for a meal to be scrummy. Beans and avocado are soooo good for you, as is rocket, yet there is a playful addition of feta and a kick of mild spice to add interest. This is a great recipe for families as children can just pick up each component separately if they like, and you know the burger they are consuming actually has a lot of nutritional value. If you don't have time to make your own burger buns, just buy some nice, fresh, seeded malted grain or wholemeal rolls from a bakery or supermarket with a bakery.

I hope you enjoy these as much as I did. Let me know if you get round to making them.

xxx Sam
Cooking for Sanity