Thursday, 10 December 2015

Greek-Style Chicken and Vegetable Pie


Hi friends! I've been having a little struggle over here with my photographs. I've had a couple of posts in mind for the last couple of weeks, but because we have no natural light in the evenings at present, I'm having to take all my photographs in fake indoor light, which hugely diminishes any contrast and casts an insipid orange glow over everything. Photography is not a great interest of mine, although I have tried to make it so in the past. I even developed my own photos in the dark room at university. Goodness, I can't believe that no-one (really) does that any longer. That was on the edge of the digital photography era, when pretty much everyone still had a 35mm and took their film to a camera shop to get it developed. Oh, the excitement of opening that long, colourful envelope full of potential, following a week of excited expectation. When I think about it now, so many of those photographs were so vibrant, and the quality (when they weren't blurred) was fantastic. It was a hugely more exciting experience than downloading your photos onto a PC, or looking at them instantly on a phone.

How's that for digression?

So I need to ask your forgiveness for the abysmal quality of a lot of the photographs in this post. I think you can still get the gist, but it is certainly an area in which I need to greatly improve, and for the sake of professionalism, I do intend to. I do like to think that, one day, this blog will evolve and become something more and I want a strong foundation from which to build...something.

I had wanted to share with you for this post a really great magazine I bought quite a few weeks ago now, called Superfood Christmas, which is full of Christmassy recipes and also plenty of everyday recipes. But I have the aforementioned problem with the photos and I'm not happy with them. So I will share that on my Facebook page and share a recipe here instead. I love this recipe and I've made it so many times over the years. It's actually a combination of a couple of no-longer-available-online recipes, given a more exciting twist (basically, I just added a few more ingredients). It's simple, but really tasty, and good enough to serve to friends or to have as a family meal. It's great with piles of salad, though I must confess, I haven't come across the perfect dressing to go with the Mediterranean flavours ensconced within the pie, so if you have any Med-style salad dressing reccommendations, reccommend away!

Ingredients

1 onion
2 cloves of garlic
100g spinach (or half a regular bag)
2 small chicken breasts
Jar of sundried tomatoes
Small tin of sweetcorn (one of a three-pack)
1 egg
Half a block of feta
4 large sheets filo pastry
Olive oil
About 1 tbsp butter

Equipment: a 20cm sandwich tin


Method

Pre-heat the oven to fan 180C.
Put the chicken in an oven dish, throw on a lug of olive oil and seasoning, then bake for 25-30 minutes.


Meanwhile, melt the butter in a large, heavy-based pan with a little oil. Chop the onion and peel the garlic, then add the onion to the pan, crush the garlic and add it, then allow to soften for about 10 minutes.


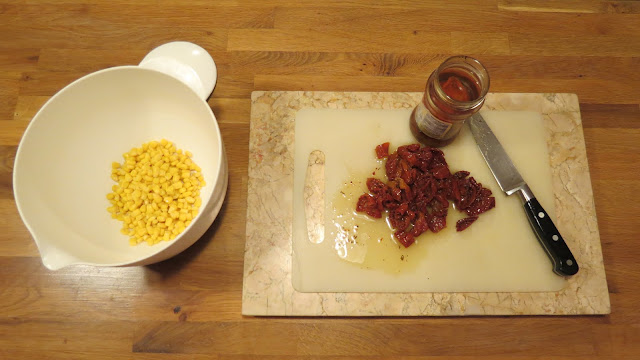
While the onion and garlic is cooking, prepare the sundried tomatoes. Chop them into smallish pieces, then add them to a large bowl along with the drained tinned sweetcorn. Don't discard the SDT jar.



Once the onion has softened nicely, add the spinach to the pan and allow to wilt, then add the onion mixture to the bowl.


By this time the chicken should be ready, so remove it from the oven and shred it (how did you guess?) then add it to the bowl, followed by crumbling the half-block of feta over the top. Do not turn the oven off.


Mix everything together well.


Finally, crack in the egg, generously grind over some salt and pepper, then give it all a last mix.


Now you need to prepare the sandwich tin. Using a pastry brush, spread a coating of oil from the jar of sundried tomatoes over the inside.


Take a sheet of filo and centre it over the tin, then gently push it into the corners, being careful not to rip it. This doesn't have to be precise, it is really to make the capacity of the pie greater and to stop the filo from ripping from the weight of the ingredients when added. Add a coat of oil to the filo sheet.


Keep adding filo sheets, at angles to one another and with a thin coat of oil, until you're used four sheets.


Put the mixture from the bowl into the pastry case.


Fold each corner onto the filling, one by one and in order, until the filling is covered and all the filo has been used.


Add a final brush of oil to the top, then bake in the still hot oven for 25 minutes until golden.


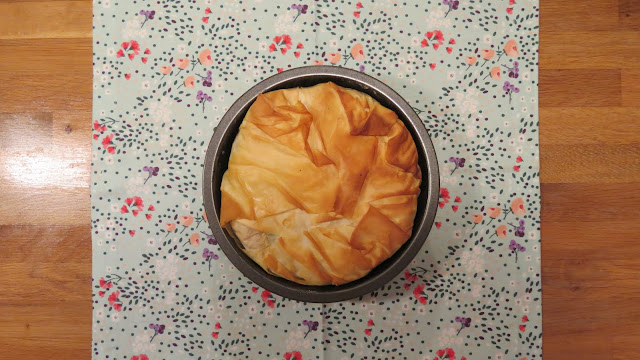
The best way to serve this pie is to remove it from the tin onto a chopping board. The next two photos are particularly awful, they're purely for demonstrative purposes!


Serve with piles of salad, or, for small prople who may find it harder to eat leaves, a few cubes of beetroot (at least, that's how big Tonju likes it). The pie really has plenty of nutritional value for you not to worry about serving it with extra veg though.


Again, I apologise for the tiny number of finished meal photos. I'm not even happy with these, but I needed to show you something! It may not look it, but this is a really tasty meal, and my boys really enjoy it too. It has a lot of flavour and some interesting textures, and the filo holds it all together beautifully. You could easily substitute ingredients, or just leave some out if you wanted. I would imagine olives would be a nice substitute for something. If you have a go and make some changes, I'd love to hear what you've tried and what has worked for you; which ingredients you would reccommend having a go with. I hope you enjoy this meal as much as I (always) do.

Thanks, as always, for reading; your precious time is greatly appreciated.

xxx Sam


Wednesday, 18 November 2015

Bulgar Wheat Stir-Fry Veg with Tahini Honey Dressing


Hi hungry readers, I can't believe how quickly the last two weeks have flown since I last posted. There is so much going on in life, on top of which is the amount of work I need to catch up on for The Library Project. I did go on a coffee shop tour the other week with two other trustees, in which we visited a couple of really great coffee shops, including The Old Library in Caerphilly, a fantastic library refurb in which a local couple had turned a derelict old library space into a community coffee shop. The size of the space was considerably smaller than the space we have to work with, but it was decorated really well, with wallpaper imitating bookcases full of books, and book and library orientated paraphernalia. Oh, and the coffee was really fantastic. I would highly recommend paying a visit if you're in the area. It caters fantastically for children, with a dedicated childrens' area, and the building is literally set on the edge of a park adjacent to a playground. The very kind Angela spent quite a bit of time with us, showing us around and giving us recommendations regarding kitchen equipment and serving coffee. We also visited Baglan Community Church which is a huge church centre which incorporates a coffee shop, and again, the very kind owners showed us around and gave us copious advice. We certainly have a lot to think about!

So the recipe I'm sharing with you today is nice and simple. It's one of my own, although it's so unbelievably simple anyone could come up with it. It's inspired by a lot of the books and blogs I've been reading lately, as well as by Hugh F-W (of whom I'm a great fan, which you'll know if you've been reading for a while) through his eye-opening programme, Hugh's War on Waste, shown on BBC One. I have so much to say about that programme (you can check out my Facebook page for a bit more information) but I've been really trying to use up excess food and not throw away so much. I've put together some delicious lunches in the last couple of weeks, made entirely of fridge and storecupboard finds, and I've felt so much healthier in the day time, having consumed far less bread!

You can swap the veggies I've used in this recipe for whatever you happen to have in your fridge really, though it will obviously work best with those that are crunchier. Here are the ingredients I used though, and it's really tasty! These amounts are for one adult and two small children.

130g bulgar wheat
500ml veg stock from a cube
One red onion
Chestnut mushrooms
Brocolli
Leeks
Cherry tomatoes
2tbsp coconut oil

Dressing ingredients
1 tbsp tahini
1 tbsp honey
1 tbsp olive oil


I haven't given amounts for the mushrooms, brocolli and leeks because you can basically use as much as you fancy. If you wanted to make this meal for two adults, I would use 150g bulgar wheat and increase the amount of stock according to the packet instructions.

Method

First, prepare the mushrooms, red onion and leeks. Peel the mushrooms then slice. Slice the onion and leek.


Boil the kettle and make the stock for the bulgar wheat. Add the coconut oil to a heavy-based frying pan whilst you are waiting for the kettle to boil, and set the hob to a medium heat. Once the stock is made, pour it over the bulgar wheat in a saucepan and add to the hob with the frying pan.


Bring the bulgar wheat to the boil then turn down to a low-to-medium simmer and time for 15 minutes (keep an eye on it from around ten minutes though, you don't want it to go soggy, so if it feels like it's nearly absorbed enough liquid by then, just remove the lid and turn up the heat so the remaining liquid boils off, being careful not to burn the bulgar).

Add the chopped veg to the melted coconut oil in the frying pan. Allow to soften and gently colour to golden for about ten minutes.


While the bulgar wheat and veggies are on the hob, prepare the brocolli and cherry tomatoes. Simply chop the tomatoes in half and make the brocolli florets bite-sized. I obviously didn't use a whole brocolli for myself and two little ones!


When the mushrooms, onion and leeks have softened and are looking really tasty, add the brocolli and tomatoes to the pan, making sure you put the tomatoes cut-side down for the first couple of minutes to get the juices out and get some caramelisation going on. They only need a few minutes, as you want to retain the crunchiness of the brocolli (I despise squishy broc, unlike my parents!). Don't forget to season.


 Check the bulgar wheat at this point. It will look like this when ready, with little sink holes all over the surface.

While the things on the hob are finishing off, make the dressing. This couldn't be easier; just put all the dressing ingredients in a bowl and mix together.


Once everything is ready, you can dish up.


Begin with a serving of bulgar wheat, then top with the veggies and finish with a generous swirl of dressing.


This is a really great recipe to adapt if you are looking in the cupboards for a meal to rustle up. You can swap the bulgar wheat for rice (preferably brown) or wholemeal pasta, couscous or quinoa. As I said previously, the veggies are also totally open to experimentation. I must say though, I do love the sweetness the caramelised tomatoes bring to the dish. So really this recipe is an enabling recipe. It's a basis from which you can create something of your own. Or you can follow this to the letter if you like! Be inspired to try something different in your kitchen today and have a good rummage in your kitchen cupboards and fridge. Feel free to share your creations on the facebook page, or post a link to your own blog in the comments.

Thanks so much for reading :-)

xxx Sam

Cooking for Sanity