Sunday, 10 May 2015

Lamb and Rhubarb Pasties


So we all know by now how I enjoy experimenting with new and unusual recipes and surprising people with unexpected tastes, but I anticipate this recipe, which I personally think is genius, will at the very least, raise some eyebrows. It is from another of my favourite River Cottage cookbooks, Fruit Everyday, and is, "an echo of the traditional Cornish pasties eaten by tin-miners that had meat at one end and jam or fruit at the other," according to Hugh F-W. I bought this book quite some time ago now, when it was originally out in the shops, and this was a recipe that immediately struck me for it's originality (I'm aware of the contradiction in that statement given the recipe's inspiration.) I made these for dinner earlier in the week, which was the second time I've cooked them, but last time I made them, I hadn't been able to source the rhubarb so used a different fruit which has escaped my memory for the time being.

Now last time I made these, there were a couple of small issues which came to light, mainly concerning the peculiarity of one pastry containing both the main course and pudding. Poor husb just could not get his head round it, and requested, should I ever make them again, that a pastry "barrier" be inserted between the meat and the fruit so as to indicate where one ends and the other begins. I quickly laughed this comment away, but when it came to making them again, I did recall this request and acknowledged the unfairness on my part of foisting these experimental dishes upon my family but not taking into account their preferences. So this time a barrier was included. Look out towards the end for the big faux-pas, which I had also made the previous time...

One of the reasons I love this recipe, and many others, is for its simplicity and the way a minimum of ingredients work together to make something utterly delicious. This begins with the mouth-watering shortcrust pastry. The recipe in the book makes four pasties if you use a side plate as a template. As we are two adults and two children, I slightly altered the amounts, to make husb's and mine slightly larger than that by about one centimetre all the way round, and the boys' one the size of the plate.


Making pastry is really so easy. I've always been led to believe it is an elusive skill, but I've made shortcrust a lot lately and I've found the recipes I've used have been fantastic and the pastry has been easy to handle and holds together excellently. In the case of both recipes I've used for shortcrust however, I've had to add significantly more liquid than specified (I've used this River Cottage recipe and also Ruby Tandoh's shortcrust recipe in her delicious book, Crumb).

The ingredients for making pastry are so simple, I am always taken aback at how something so bland seeming can taste so delicious. Because I slightly appropriated the amounts for this recipe, I will share them with you.

350g plain flour
180g cold unsalted butter, cubed
pinch of salt
Approx. 75-80 ml cold milk

Put the flour and salt in a bowl and mix together with a small whisk or large spoon, then add the cubed butter and rub into the flour until the mixture resembles breadcrumbs.


Add most of the milk but leave about 15ml in the jug whilst you combine the rest with the dry ingredients. The best tool for this is a flat, blunt knife; a butter knife is ideal. Cut into the flour and milk mixture and bring both together, and if you're struggling to bring the last crumbs into the dough which has formed, add the remaining milk little by little, using your hands to bring the last few crumbs in. You don't want the dough to be wet. It should look like this...


 Wrap in clingfilm and place in the fridge for at least half an hour.

Here is a visual demonstration of what I said above, about this recipe being so simple yet so delicious: look how few ingredients go into the pasty filling.


The savoury side simply contains lamb, diced quite small (2ish cm) an onion, a couple of small potatoes, about 30g melted butter and a splash of Lea and Perrins, the sweet side comprising chopped rhubarb and a couple of tablespoons of caster sugar.


I prepared the sweet side first just to allow the sugar and rhubard to mingle for a little longer and develop a bit of flavour.

The savoury ingredients are also added to a bowl, with no prior preparation (no need to par-boil these teeny potato cubes!) other than dicing the lamb, potatoes and onion. The butter needs to be melted and added to the meat and vegetables and a few splashes of worcestershire sauce added, along with a couple of generous grindings of salt and pepper.


Now the pastry can be removed from the fridge (it's actually best to do this a little bit before you need to work with it if it's been in for longer than an hour or so.)


Place on a floured surface, flour your rolling pin and prepare to roll! The pastry needs to be aproximately 4mm thick before being cut.


If you, like me, have a healthy appetite, rest assured that even if you don't enlarge the circumference of your pastry, it will be plenty big enough!


The brilliant thing about this pastry is the way it will roll back into itself after each plate has been cut out, so the minimum possible is wasted. If you fold it in such a way that it is even, as here...

 After first plate

After second plate

Third plate

As you can see, nearly all the pastry has been used, and there is a little spare should you need to do any patching up once your pasties are assembled. This is where my unusually long worktop once again comes in handy - pasty assembly line!


I do like to pile on the ingredients, as you can see, which can lead to angular protrusions of potato and rhubarb through the pastry. However, as I said earlier, any spare pastry you may have leftover can be used to patch up these holes, as the eggwash which is applied to the pastry very satisfactorially binds the pastry pieces together. The eggwash consists simply of one egg beaten with a splash of milk, which is also applied to the circumference of the flat circles now, before the edges are pressed together.


Once the pasties are fully assembled, they are placed on a baking tray and patched up, if necessary (my patches can be seen on the left and middle pasties) before being painted with eggwash. The patches will smooth over nicely.


Now this is where careful attention needs to be paid as to which end is which, because chopped rosemary is sprinkled on the savoury lamb and and caster sugar on the sweet rhubarb, before they are placed in the oven at 170C Fan for 35-40 minutes. You will see why such care is needed as you read on...


When they come out of the oven, they should look rather a lot like this...


The smaller pasty on the right was for the boys to share. I simply cut it lengthways down the middle. You could easily make two much smaller, individual pasties as the amount of pastry yielded from the recipe above would be plenty if you were to use the size plate down from a side plate (now what is that called?) or any other circular "thing" you may have to hand which you feel would work.


There's no need to be concerned about presentation with this meal, simply put it on a plate and serve. However, it also lends itself to being presented perhaps in some sort of newspaper or those thin sheets they use in fish and chip shops which are like newspaper but without the print, if you wanted to make something more of the recipe's roots. These pasties would also be ideal to take on a picnic or even on a hike. They would store well wrapped in foil and eaten at the top of a mountain, welcome sustenance after a gruelling trek!

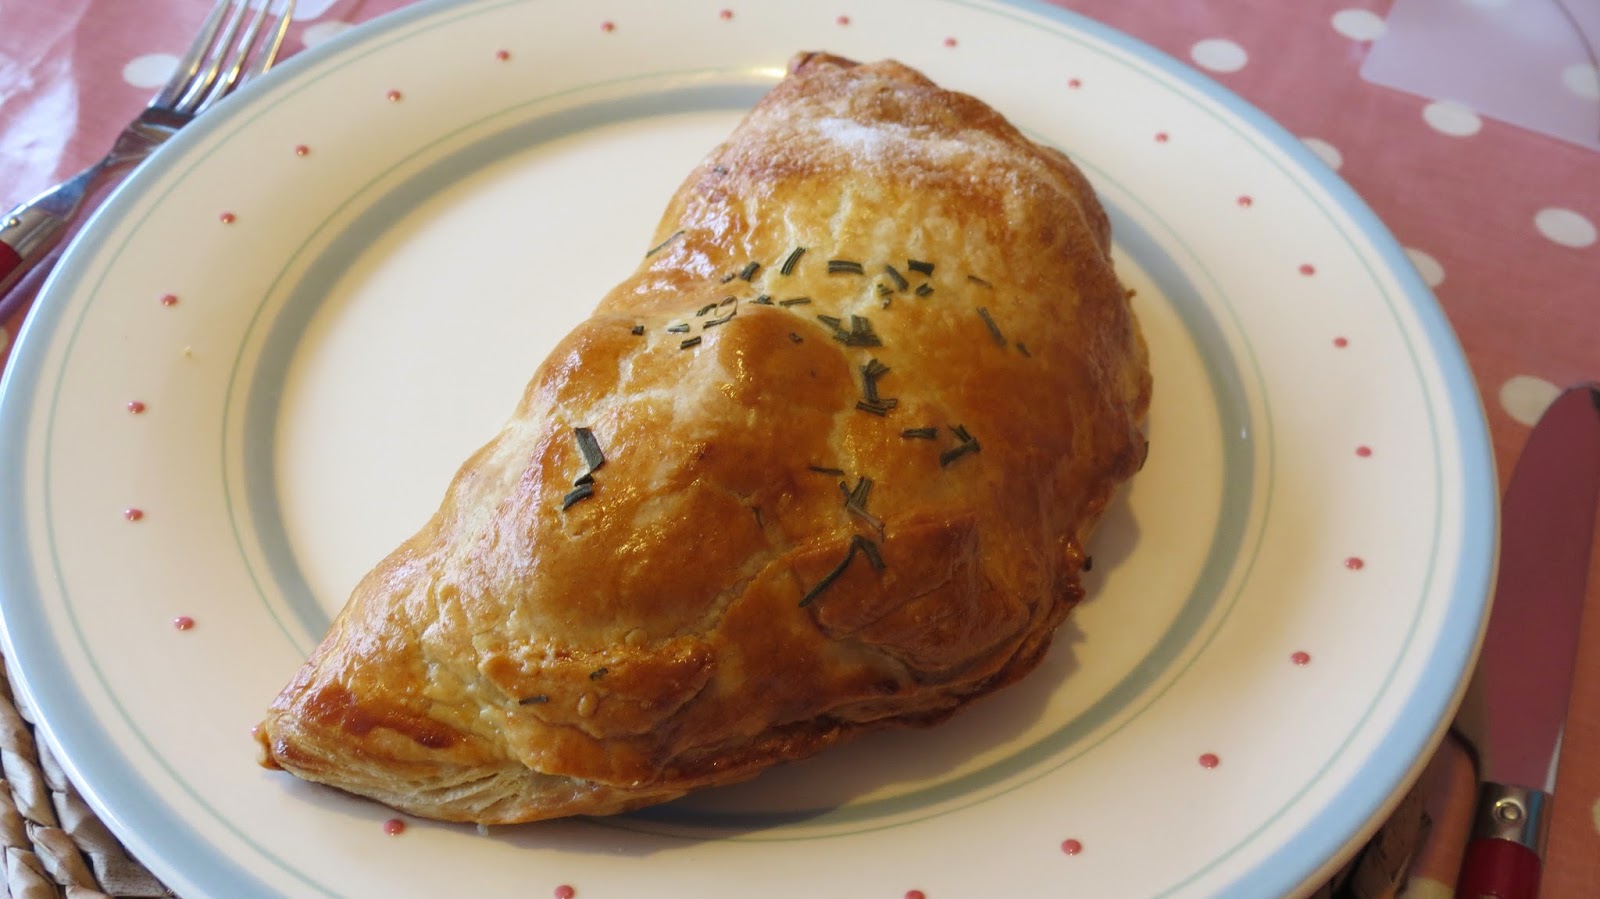
 
So we all sat down happily to dinner, me last of all, as usual. I picked up my cutlery, ready to make the first slice, when I heard from across the table, "Eurgh no! You've put the sugar on the savory side! AGAIN!" Yes, thats right readers, I had made the dreaded mistake, can you believe for the second time, of putting the savory and sweet toppings on the wrong sides of the top of the pasties. And yes, it was the same for each of them. I must have inadvertently spun the pasties around as I was placing them on the baking tray, causing me to add the toppings on the wrong sides. I tried to be so careful, and husb was not impressed. He bears very well with my experimental cooking, but sometimes it all gets a bit too much and he wishes he had a cooked-from-frozen lamb burger, some boiled frozen mixed veg and a handful of boiled potatoes in front of him instead (not going to happen I'm afraid!) Time for some urgent reconstructive surgery. I sliced the top off, cut it in half, and placed the correctly topped halves on the correct sides. This did mean the shapes were unfortunately inverted, but this was not a problem to me (husb on the other hand...) but it was easily resolved and added a kind of suspenseful drama to dinner time, not that we need more drama with two small boys giving us all the drama we could possibly need...

Post-reconstruction


The boys mainly enjoyed this meal, particularly the rhubarb end. The little one enjoyed picking out the potato by hand and eating it, though the pastry was a bit too much for him and he did leave rather a lot.

It really is such a treat when one realises the savoury end has been finished and the sweet end can be started. I like to neaten up all the edges and make sure all the crumbs on the plate have been munched before taking the first slice of rhubarb. It's also nice to wash down the lamb with a swig of whatever drink takes your fancy. My drink of choice is...(drumroll please)... water! Always! Oh, apart from when my MIL manages to persuade me to have a glass of wine. 


 I know I keep raving about this, but I cannot emphasise how delicious this simple rhubarb and sugar combination is. And the sugar topping on this end of the pastry adds a different taste and emphasises the versatility of this shortcrust pastry recipe. I suppose you could have a jug of cream or custard on the table for when this end of the pasty is reached, although, in my opinion, it would detract from the authenticity of the recipe.

So, if you are enticed by this recipe and think it's a fantastic idea (as did a friend whom I was telling about it earlier today) I suggest you run it past your lucky recipients beforehand, as they may have an aversion to the idea of sweet and savoury encased inside one pasty, and may wish to request full savoury, or perhaps an internal pastry barrier to separate the fillings! But if you know they won't be fussy, or simply don't care (!) go ahead and make them without ceremony and place on the table, ready to observe the looks of surprise, followed by either admiration or disgust! I have decided, however, that I perhaps need to appreciate that my husband is not as adventurous as me when it comes to what we eat for dinner at home (not when eating out; he's probably more adventurous than me then, ironically) and take that into account when experimenting. I can think of several male friends who, if they read this, would be saying, "Too right you need to take it into account; that pasty is a disgusting idea!" Who said cooking was a dull duty to be performed out of necessity? 

I hope this post has inspired you to try something a little out of the ordinary. If you do, share it on the "Your Food Photos" album on the Facebook page. I love to see people being inspired to embrace the joy their kitchen can hold, rather than viewing it as a place in which they must spend time out of necessity rather than desire. 

Happy (experimental) cooking!

xxx Sam

Thursday, 7 May 2015

Veggie Cakes Bakealong: Deliciously Ella Sweet Potato Brownies


I've been rather excited to write this post because I knew these brownies would cause some controversy, and I was certainly right! In the recipe photos on Ella's blog, they look moist, chocolatey and delicious, as if they would taste the same as any other chocolate brownie... if you didn't know they contained sweet potato and that they actually contain no generic chocolate, but only in the form of raw cacao. Herein lay my anticipation; I couldn't wait to watch the expression on husb's face as he took his first bite. I didn't anticipate, however, such a negative reaction, and I was a little disappointed I must admit.

I seem to have inadvertantly begun the review already, before I've actually gone through the recipe, which I hadn't intended. But as I've begun, I shall continue, because I now need to persuade you to actually make these brownies after telling you my husband didn't like them! I really enjoyed them. I am finding lately that I'm more interested, when deciding on what sort of cake to bake, in trying ingredients I wouldn't usually be drawn to. It was, once upon a time, that if there was a choice of cake to eat and chocolate was one of those choices, that the chocolate would win every time without contest. Obviously I've chosen a chocolate type of cake here, but really that is incidental, as it was the sweet potato aspect I was drawn to.

These brownies are very moist, and they don't dry out after being stored for a couple of days, but retain their moisture very well. They fulfill the desire for a quick sweet hit without being, actually, particularly sweet at all. Their sweetness is subtle, and it works with the delicious, brownie like texture, providing satisfaction without the guilty feeling so often experienced by many after eating a slice of immensely chocolatey cake. I would definitely recommend them to add to your repertoire, even if just for the experimentation aspect. And don't have unrealistic expectations. They are not full fat, calorie laden chocolate brownies so don't be surprised when they don't taste like them.

The method for these brownies is fantastic and so very simple. I'd never steamed sweet potatoes before, but it's a great method for cooking them and getting them really soft.


Then you just throw them in the food processor with the pitted and chopped dates and pulverise until they make a smooth paste.


I also used the mini mill on my food processor to grind the almonds, rather than buying ready-ground almonds. It does a fantastic job, and they look just like shop bought ground almonds but are so much cheaper.


I used a new (to me) ingredient in this recipe - raw cacao, which I bought in Beanfreaks health food shop in Cardiff, but which you should be able to purchase in any health food shop and also online. As far as I can tell, raw cacao is what most of us would refer to as cocoa powder, but it is unrefined and not heated above a certain temperature. I shall endeavor to add a more in-depth description of it on my new Interesting Ingredients page, which you can link to by clicking the Interesting Ingredients tab at the top.


The raw cacao is added to the ground almonds along with the other ingredients, finishing with the sweet potato mix. It is all placed in a baking tin and baked for 20 minutes. Ella doesn't specify a size of baking tin, so I used a 20 x 20cm tin and it was perfect.


I loved the consistency of the mixture, and it was easy to ma nipulate into the corners of the tin. When it came out of the oven, it looked like this...


I presented them nicely on a cake stand and we all congregated at the table to sample them.


On Ella's recipe photos, the brownies seem to have an almost gold-like sheen. On baking these, I discovered that the sheen I thought I could see is actually chunks of sweet potato which hasn't fully broken down in the food processor. I think, comparing the photos of mine and her's, that I blitzed my mixture for slightly longer, as I don't have nearly as many visible chunks of potato, although you can see some bits in the photos above.

So, to return to the verdict. The Tonjus guzzled them down easily, which is a good thing I think, as they are not sugary and sweet, yet they were very happy to eat them and definitely enjoyed them. The only adults who tried them other than myself were husb and MIL, whose reaction was similar to husb's, but somewhat more measured and reasonable. I think the thing with these brownies is that they look so much like generic brownies that if someone doesn't know that they are't, they are taken by surprise and don't know what to think. They may even be a little disappointed not to get the anticipated chocolate rush. I think perhaps the best approach with these brownies, when sharing them with others, is to inform them as to the ingredient with plenty of notice, so they can prepare their tastebuds. This brownie is really worth baking and tasting, but sensory preparation is necessary I think.

I hope you enjoyed our foray into baking cakes with vegetables, and I'm looking forward to putting together the final round-up post of your bakes so everyone else can see what you've made. Thanks for participating, even if it's only been by reading along.

x Sam

Monday, 4 May 2015

Interesting Ingredients: Tahini

Over the last week I've been experimenting with some recipes from a delightful new cookbook, Sesame and Spice by Anne Shooter, a review of which I am planning for the near future, so I won't give too much away here. However, one of the recipes I made was a batch of Tahini and Honey Cookies, and I was very amused by peoples' reactions to them. I had initially made the batch for an outing my church toddler group had arranged for last Thursday, but the big Tonju was very ill; one of those 24 hour things where you feel so sorry for them for one day, but the next they are fine and bored to tears, but they have to stay home from nursery because they've been sick in the last 48 hours. So I ended up with a batch of 30 biscuits, which I lovingly presented in a tin, having separated the layers with baking paper. I decided to take them with me to our church evening meeting yesterday, so as to allow the people for whom they were originally intended to sample them, and also because I was very interested in seeing their reactions.

I'm not going to talk particularly about the biscuits themselves here, as that will come in the book review, but I loved telling people the name of them, as it was evident that most people had no idea what tahini is, and I confess I only came across it in the last couple of years, though for some reason I had an inkling as to what it was.

Tahini is a thick paste made entirely of crushed sesame seeds with absolutely no additives.


It usually comes in this type of tub, or in a jar. It has a thick consistency and the solid and oil has a tendancy to separate if the container is left for a while, so it usually needs a good stir when the required amount has been measured out into a bowl or other container. It can be found in the world foods aisle of (very!) large supermarkets, but much more easily in any health food shop.


Once any lumps have been removed by a good stir, the tahini will have a beautiful, smooth consistency and a slight sheen to the surface. It can be used in both savoury and sweet recipes, and it is very common for honey, lemon or both to be added to it. Tahini is incredibly viscous, and many people do not like the taste and texture of it before it has had other goodies added to it. I, however, am not one of those people, and can happily eat a teaspoonful of tahini on its own! I think I like the bitter tang; I also love green tea and olives so I think raw tahini is probably along the same lines.

This delicious recipe is a great one for using tahini in a savoury context:


This is the cookie recipe I used in Sesame and Spice. There's no lucky online link I'm afraid, but here is a search for tahini recipes on BBCGoodFood, if you'd like to give it at try.

And finally, in case you wondered, as did my big Tonju when we last had the sesame halloumi parcels, where sesame seeds come from, this fantastic book...


...reliably informs me that is from, "a tropical or subtropical plant that produces seed pods that, when dried, burst open and are then shaken to encourage the release of hundreds of tiny seeds." 

This post is the first of hopefully many which will shed light on new or slightly unusual ingredients. If there is an ingredient you would like to see elaborated upon, leave a message in the comments or on the Facebook page.

As always, thanks for reading :)

xxx Sam

Ps. I'm looking forward to showcasing the delicious veggie bakes very soon...!!!


Friday, 1 May 2015

Healthy Snack Quest: Fruity Fridge Flapjacks


I don't know if this is something you struggle with, but my boys absolutely love cereal bars. I've made a rule in our house that for mid-morning snack, they are only allowed to have fruit. This usually ends up being a banana, but little Tonju also loves plums and pears or a bowl of strawberries and blueberries. If they are extra hungry they can have a Babybel cheese as well (or a revolting cheese string - bleurgh!). In the afternoon, they are allowed a snack that is a little more exciting. Of course, they can still have fruit, and cheese if they didn't have it earlier, but what they always ask for is a cereal bar.

Everyone knows about the trap of the cereal bar, that seemingly innocuous product sitting innocently on the supermarket shelf in all its attractive packaging. There are cereal bars that are actual breakfast cereal brands, the ones aimed at adults often claiming to contain next to no fat; bars that are "healthy," made of oats, seeds and other slow release energy providers, and the ones that don't actually try to be something they're not, such as the good old Tracker bar - surely the original cereal (type) bar, full of peanuts and chocolate chips. Now, I'm not on a cereal bar doing-down rampage; I was brought up on cereal bars and they don't seem to have had a detrimental effect. It's a bit like the whole, "I only give water and milk to my children to drink; they only have juice on special occasions." (Yes readers, that's me!) Again, almost the entirety of my childhood liquid comsumption was in the form of Robinson's orange squash, and those were in the days before double concentrate. Maybe we've all become a load of hypocrites in our old age. Not naming any names, but someone in our house that isn't me, unpacks the contents of the boys' party bags when they've returned from a party, puts the sweeties in a tin as we wouldn't want them to eat them all at once, and then secretly helps themselves when the boys aren't looking! Like I said, a load of hypocrites! Although I'm sure that doesn't happen in any of your houses...

Back to cereal bars. We know the main issue with these easy snack products is the amount of sugar they contain, and perhaps preservatives, although I know nothing about those. So I've decided to begin a quest for the tastiest healthy snacks, not restricted to cereal bars but certainly inspired thereby. The snacks don't need to be sugar free, far from it in fact, but the point is to see how much sugar they contain and what other ingredients are included. Obviously the less sugar the better and the more taste derived from inherent sugars, for example, from dried fruits, the better.

I'm going to begin with these really tasty Fruity Fridge Flapjacks from River Cottage Fruit Everyday, and you are so lucky because I have literally, just this minute, done a search for the recipe in case it's online, and it is! That is very pleasing because I know it can get frustrating if a recipe given is from a book and can't be fully shared because of copyright issues, and I'm sure some of you would like to try this recipe for your children (and yourself!)

Now, I don't want to give the impression here that I'm a mum who gets her children involved in cooking very frequently. To tell the truth, cooking with my boys is one of the most stressful things I could do. If I want to make myself feel on edge and frustrated, I should just suggest we do some baking together, and there will follow a period of time spent stopping the Tonjus fiddling with every conceivable item on the worktops, fighting over and pushing each other off the stool, which is an unfortunate requirement at present due to their lack of height, trying to add excess ingredients to the mixing bowl and simply NOT LISTENING TO A WORD I SAY! My blood pressure is rising just thinking about it! But I decided that, since this recipe was to be mainly for their benefit, it would be good for them to "help", and I did manage to get some sweet shots which don't in any way represent what came in between. If you make this with small children, I recommend you prepare the stoned fruit in advance so as not to encourage the idle hands of boredom as you hurry to stone your dates!

The ingredients

The first part of the recipe is ideal to get children involved with: adding the dates, prunes, bananas, honey, coconut oil and water to the food processor (please see link to recipe for ingredients). They can break up the bananas into chunks, and fight over considerately share out the prunes to ensure each adds the same amount.


"Noooo, those are my prunes!"


Children can also enjoy the unfailingly exciting job of turning the blender knob to "on".


The blended mixture

Depending on the age and dexterity of you children, they can even add all the dry ingredients to the bowl, and they can certainly get involved in mixing them together, though the oats have a tendancy to fly out and over your worktop if the wooden spoon is thrashed about too vigourously, so take care with very little ones.


The recipe recommends you mix the wet and dry ingredients together with you hands, and I would totally concur with this; they are absolutely the best tool for the job. Once you've added the blended fruit and honey to the dry ingredients, give it a slow and precise stir with a wooden spoon to basically combine everything...


...then get your hands in!


Those last two photos aren't included because of their technical superiority (come to think of it, none of the photos you'll see on this blog are, because I really know nothing about taking good photos) but because my sweet big Tonju took them, and he's 4 1/2 years old, so I thought they were pretty good and worthy of inclusion.

Now for the magical part of this recipe; suddenly it all comes together in quite a surprising and beautiful way. Your strange bowl of dusty mush has transformed itself into this:


And once pressed out (which does take come doing, I warn you) it will look like this. Really rather pleasing.

 
Now comes the moment when you open your fridge and realise that there is no way this gargantuan baking tray is going to fit, unless it is balanced precariously upon the tops of yoghurts and punnets of fruit, in a rather disconcertingly uneven manner.

Once taken from the fridge and the baking paper backing removed (I forgot to mention, although you have hopefully inferred it, that this recipe requires no baking) the flapjacks can be neatly cut up into slices to be stored, much more neatly, back in the fridge.


Slice with an extra long knife if you have one; it will do a much better job than lots of smaller slices.


I recommend separating the layers with baking paper so they don't get stuck together whilst being stored.


This box lasted us, with the boys and I having one each, every afternoon, for a week and a half, which isn't bad going. They keep extremely well in the fridge, especially if you have one of those extra cold fridges which seem to keep things fresher for longer in general. There was no problem with the banana going off or anything like that.

So the overall verdict is that these are a fantastic snack. They are tasty, whilst tasting healthy - they are comprised entirely of fruit, oats and seeds which I think is fantastic. A snack with absolutely no added anything (assuming you use unsulphured dried apricots, which I, erm, didn't!) So a good start for the healthy snack quest. They went down really well with the boys, husb and also my mum (with whom any snack goes down well, although apparently not chocolate, hey mum?) and they lasted well and for a good length of time.

The only problem I envisage for this quest is the cost, as seeds are really expensive, so I shall be looking for ways to acquire seeds at minimum cost. Any recommendations would be very welcome.

Thanks, as always, for reading and have a most marvellous bank holiday weekend :)

x Sam 
Cooking for Sanity